There are three ways to add captions to Instagram Reels: turn on Instagram's automatic captions before you share, type the text yourself in the Reels editor, or "burn" subtitles into the video file before uploading. Auto captions are the fastest. Burned-in subtitles give you the most control over how the text looks and guarantee every viewer sees it. Below is how each method works, when to use which, and how to style captions so people actually read them.
A quick note on words: on Instagram, "caption" also means the text under your post. This guide is about the on-screen text that shows what you're saying, the subtitles.
Why captions matter for expert Reels
If you teach, coach or explain things on camera, your Reel lives or dies on whether people follow your words. Captions help with that in several ways:
- People watch with the sound off. In a waiting room, on public transport, late at night next to someone asleep. Without text, a talking-head Reel is just a face moving.
- Accessibility. Viewers who are deaf or hard of hearing rely on captions to follow speech at all.
- Comprehension. Terms, names and numbers land better when people both hear and see them. That matters for a psychologist explaining a concept or a marketer naming a tool.
- Holding attention. Text that changes on screen gives the eye something to track during the first seconds, where your hook has to do its job.
We don't have a reliable number for how much captions lift views, and you should be wary of anyone who quotes one. The practical case is simple: captions remove a reason for someone to scroll past.
Method 1: Instagram's automatic captions
Instagram can generate captions for you using speech recognition. According to Instagram's Help Center, when captions are on, the speech in a reel is automatically written out as text at the bottom of the screen.
How to add auto captions before you share
- Start a new Reel and select or record your video.
- Tap Stickers in the editor.
- Tap Captions to generate the captions.
- Check the generated text, then finish and share as usual.
How to turn captions on or off on a Reel you already posted
- Open the Reel and tap Options (the three dots) at the bottom of the video.
- Tap Manage, then Edit.
- Tap Advanced settings and use the toggle next to Enable closed captions.
Instagram notes that if captions are available for your posts, they show automatically unless you turn them off. A few limits are worth knowing, all from the same Help Center page:
- Captions "may not be available to everyone", so you may not see the option on every account.
- The default caption language depends on the viewer's device language settings.
- Viewers can choose to always or never show closed captions in their own settings, so some people will switch your auto captions off.
When to use it: for quick Reels where you speak clearly, and as a backup on top of other text.
Watch out for: speech recognition gets jargon, names and non-English words wrong. A coach saying "HRV" or a beauty pro naming a product can end up with nonsense on screen. Always read the result before posting.
Method 2: Add key phrases as text yourself
Instead of a full transcript, you can type short text blocks onto the video yourself, in Instagram's editor or in any video editing app you already use. This works best for key phrases: the hook, the three steps, the takeaway.
How to do it well:
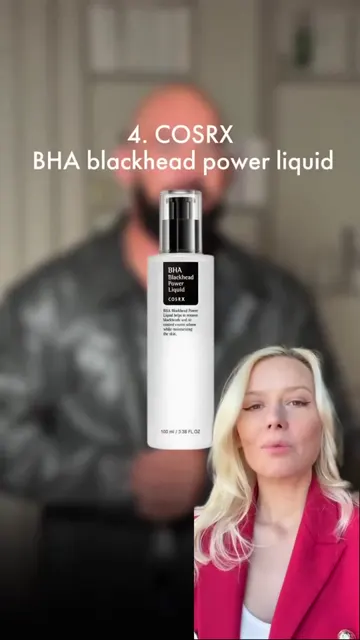
- Write captions for the main beats only. "3 signs your skin barrier is damaged", then "1. Tightness after cleansing", and so on. Each line appears when you say it.
- Time each text block so it shows up while you're talking about it and disappears when you move on. If your editor lets you set when a text appears, use it. Text that stays on screen for the whole Reel stops being read.
- Keep it short. If a line doesn't fit in two rows on a phone screen, cut it.
When to use it: short Reels with a clear structure, list-style content, or when you want headline-style text rather than word-for-word subtitles.
Watch out for: manual text takes time, and a full transcript typed by hand is rarely worth it.
Method 3: Burned-in subtitles (open captions)
Burned-in captions are part of the video image itself. You add them in an editing app or a captioning tool, export the file, then upload it to Instagram.
Pros:
- Every viewer sees them, regardless of their caption settings.
- You control font, size, color, position and how many words appear at once.
- The captions travel with the file, so the same video works on TikTok and YouTube Shorts without redoing anything. More on that in our guide to repurposing Reels.
Cons:
- If you spot a typo after posting, you can't fix the text on Instagram. You re-export and re-upload.
- Some viewers can't turn them off.
- If you also leave Instagram's auto captions on, you end up with two sets of text on screen. Turn the auto ones off for that Reel.
When to use it: talking-head Reels where the message is the point, which is most expert content.
Closed captions vs burned-in subtitles
| Instagram auto captions | Manual key-phrase text | Burned-in subtitles | |
|---|---|---|---|
| Effort | Lowest | Medium to high | Low with a tool, high by hand |
| Who sees them | Viewers with captions on | Everyone | Everyone |
| Style control | Minimal | Some | Full |
| Editable after posting | Can be toggled off | No | No, re-upload needed |
| Works on other platforms | No | No | Yes |
For most experts, burned-in subtitles plus a short hook line on top is the strongest combination.
How to style captions that people actually read
How the text looks matters as much as whether it's there. These are the rules we recommend:
- Two lines at most, three to six words per line. Viewers read on a small screen while listening. Long blocks get skipped.
- High contrast. White text with a dark outline or a semi-transparent background box holds up against any frame. Avoid thin fonts and pastel colors.
- Stay out of Instagram's interface. The bottom of a Reel holds your username, post caption and audio, and the right side holds the like, comment and share buttons. Put subtitles in the lower-middle area, above that zone. Check our Reel size guide for the frame itself.
- Don't cover your face. In a talking-head Reel, your face carries emotion. Captions go below the chin, not across the mouth.
- Sync to speech. Text that runs ahead or lags behind is distracting. Words should appear as you say them.
- Highlight sparingly. Coloring one key word per line helps scanning. Coloring every other word turns into noise.
- Proofread names and terms. Automatic transcription struggles with brand names, medical or psychological terms, and mixed languages.
- Match your speaking style. Clean up "um" and false starts, but keep your phrasing. Captions that read like an essay while you sound casual feel off.
Captions start with the script
The easiest captions to read come from Reels that were easy to listen to: short sentences, one idea per line, no rambling intro. If your sentences run 40 words, no font will save them. Writing for the ear first, as covered in how to write a script for Reels, makes captions shorter and cleaner automatically.
A practical workflow:
- Write the script in short spoken lines.
- Record.
- Generate captions (auto or with a tool).
- Proofread against the script.
- Adjust position so nothing collides with Instagram's buttons.
- Watch it once with the sound off. If you still get the point, it's ready.
Where WowFlō fits
If you'd rather not touch captions at all, WowFlō adds them for you. You pick an idea, get a script in your voice, and your AI twin records the Reel. WowFlō then adds subtitles, a cover and music automatically, and can publish to Instagram for you. Since the subtitles are part of the video, the downloaded file is ready for TikTok and YouTube Shorts too. Details on the auto captions feature page.
Whatever method you choose, the rule is the same: someone watching with the sound off should still understand your Reel. If you want to see how a captioned Reel comes together end to end, WowFlō's first generation is free and doesn't need a card. Your first Reel takes about 15 minutes.
FAQ
Why don't I see the captions option on Instagram Reels?
Instagram says captions on reels and videos may not be available to everyone, so the option can be missing on some accounts. If you don't have it, add subtitles in an editing or captioning tool before you upload.
Can I edit Instagram's auto-generated captions?
Check the generated text before you share, because Instagram's Help Center only documents turning captions on or off for a Reel you've already posted. If accuracy matters (names, terms, numbers), use burned-in subtitles you've proofread yourself instead.
Should I use auto captions and burned-in subtitles at the same time?
No. You'll get two lines of text on screen, which looks messy and is harder to read. If your video already has burned-in subtitles, turn off closed captions for that Reel under Advanced settings.
Do captions help Reels get more views?
We can't point to a reliable figure, and we don't recommend trusting any exact percentage. What captions clearly do is let people follow your Reel with the sound off and make it accessible to deaf and hard-of-hearing viewers, which removes common reasons to scroll away.